")
Building a new website from scratch using WordPress seems easy, but once you start to add more specific functionality, things can get complicated and time-consuming.
Moreso if you want a dynamic, data driven website.
There are great themes and plugins out there that allow you to create almost any type of website, but you might need a little bit of HTML or CSS or even PHP to get the design or functionality you want.
And this can become troublesome as you might have to spend more time tinkering with theme files or adding more plugins just to achieve the desired goal.
Worry not though, creating a dynamic website with WordPress is easy if you are using Elementor and Crocoblock's Jetengine.
If you have little to no knowledge of programming, rest assured you will be able to manage very well.
This tutorial is aimed at equipping you with the skillset required to build custom solutions on WordPress using Crocoblock's JetEngine plugin and Elementor Pro.
The Project
I will show you how to create a car sales website with JetEngine, the solution that allows you to build amazing dynamic websites.
We will be creating a new and used car sellings websites with the following features:
- Search
- Filtering by car model and features
- Single template page for the cars for sale
- Car custom post type (CPT)
- Custom fields such as Car Maker, Year, Mileage
- Custom loops
- Filterable Grid display of cars for sale
- Front end User Submission, so that users can login and list their own used cars for sale
Other kinds of websites you can achieve by following the exact same steps below:
- Real estate
- Jobs portal
- Classified ads
- Listing websites
- Directories
Special Discount
If you don't already own Crocoblock's JetEngine & JetSmartFilters, you may get a special discount here to save an exclusive 10% while making the purchase.
Why JetEngine and not other addons?
To build a dynamic website with Elementor, you need more than just the Pro version.
In the past, you needed to add several plugins, from many different developers, to be able to create such dynamic websites.
Then came in Crocoblock suite. An all-in-one addon solution for Elementor for creating dynamic websites. With this suite, you can customize just about any aspect of your site without writing a single line of code.
You can also use Crocoblock's JetEngine plugins to create a custom WooCommerce store, for example.
So, if you are here because you wish to create a dynamic website on WordPress with Elementor, then you have come to the right place.
By the end of this step-by-step guide, you'll be able to create dynamic websites easily.
Also note that with Crocoblock, you might not need Elementor Pro. Further reducing your expenses when creating your dream custom dynamic store, real estate, or car auction website.
Although generally speaking, Elementor Pro is still recommended. It makes many things much easier, such as Header, Footer, 404, and other templates.
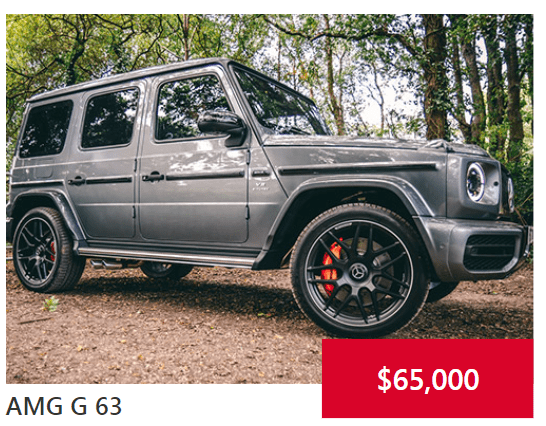
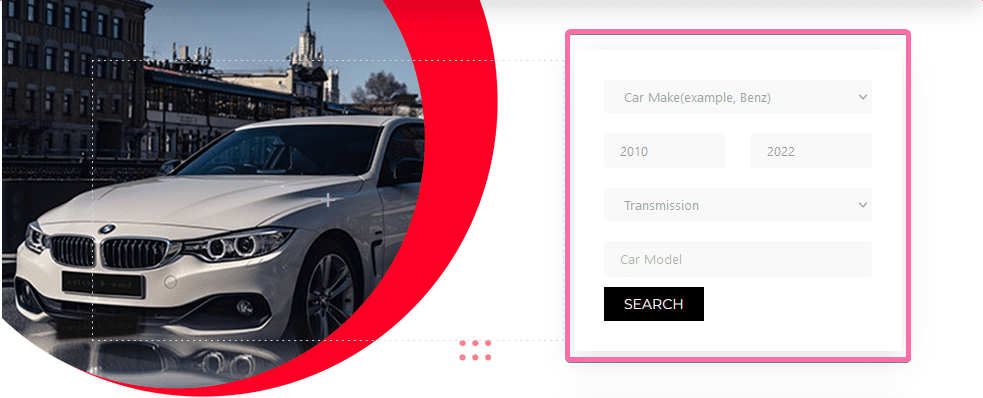
Here is a glimpse of what we will be building in this tutorial. You can also visit the demo site for the full experience.
We created that demo site at the same time as we wrote this tutorial, to give you a real-world example to follow along with.
Without further ado, let's jump right into the tutorial, and start with learning how to create Custom Post Types in JetEngine.
How to create custom post type in JetEngine
Before we jump into creating our Car custom post type, let's try to know and understand what custom post types mean, why, and when we should use them.
Custom post types are essentially the same as a regular post in WordPress. The difference between them is the value given to their post_type in the database.
By default, in every WP setup, you get these 2 familiar post_types Posts and Pages. There are a few others (like attachement) but for our purpose here, these are the two relevant ones. When you add Woocommerce to your WP site, you have another post_type with the value of Products.
So in our example, the Car custom post type will have a "Car" value for the table post_type in our database.
We could create this custom post type by writing some PHP code that we would then add to our function.php file. However, JetEngine is taking care of that part, and preventing the need to write this code.
The ability to create custom post types in WordPress means you can create different kinds of content (for example books, reviews, houses, classified listing, etc) for your website because each of these types of content will display different types of information to users.
This is how you create your Car post type
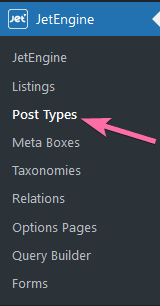
- On your WordPress dashboard, scroll down to the bottom, where you will find the JetEngine link on the vertical menu
- Hover on the link and click on the "Post Type" like from the submenu
- On the Post Type's page, click on "Add New"
- Then the following screen will be opened
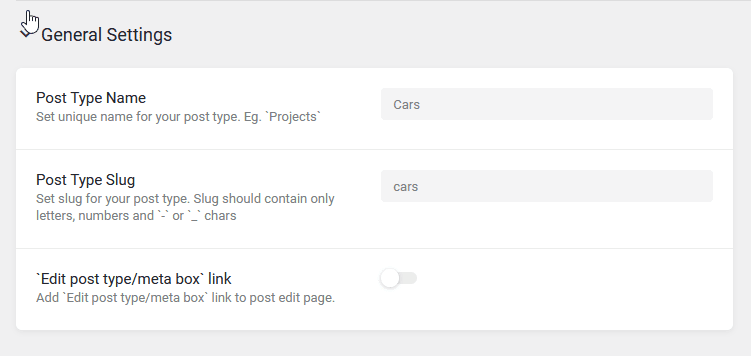
- Fill in the field after "Post Type Name" and JetEngine will automatically fill the field for "Post Type Slug"
- The post type name is what you will see on your WP dashboard while the slug field is used to access the page that contains all the content under your CPT (archive page).
- The third field which is a toggle can be left as it is or toggle it on if you want to have the "Edit" on single posts when viewing them on the front-end. This is only visible to logged-in users who can edit such posts.

- Leave the "Label" tab as it is and go to the "Advanced settings" tab. Here, you have important settings you might want to enable or disable.
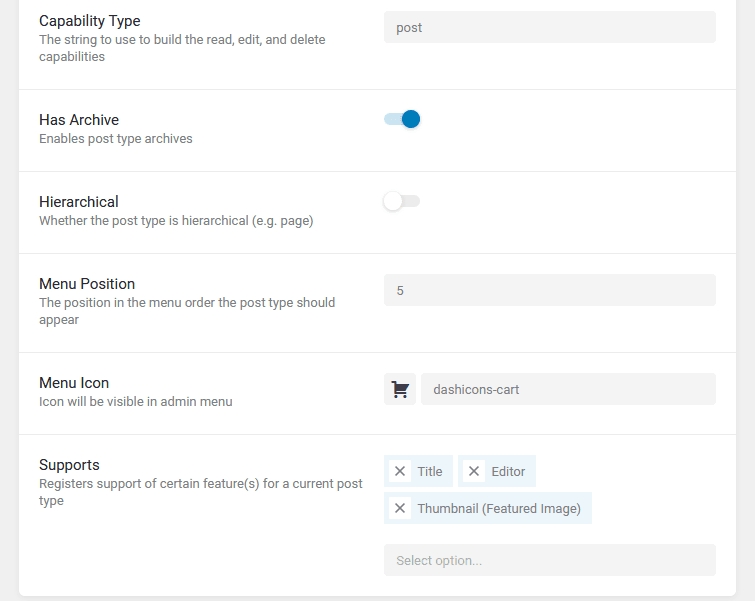
- By default, JetEngine has all the settings set right. Unless you are doing something uncommon, leave everything as it is except for the last 3 fields in the tab which you might want to change.
- In this tutorial, I have set the "Menu Position" to be 5. This is because I want my car custom post type to be after "Post" on my WP dashboard's vertical menu. The larger the number, the farther download your CPT will appear from the "Post" link.
- With JetEngine, you already have an icon pack to choose from and assign to your CPT. I chose the cart icon for my car CPT in this tutorial.
- The "Supports" field is a multi-select field where you can allow you CPT add certain WP features such as Title, Content Editor, Thumbnail, Comment, Excerpts, Author, Page Attribute, Custom Fields, etc. For this tutorial, I allowed support for just 3 fields as seen below.
- If your CPT will contain more information you might want to creative show on the front-end for a better user experience, then you'd want to add meta boxes(custom fields) to your post type.
- To add meta boxes, open the "Meta Field" tab. The image below shows how you will see when you click on the "New Meta Field" button in this tab
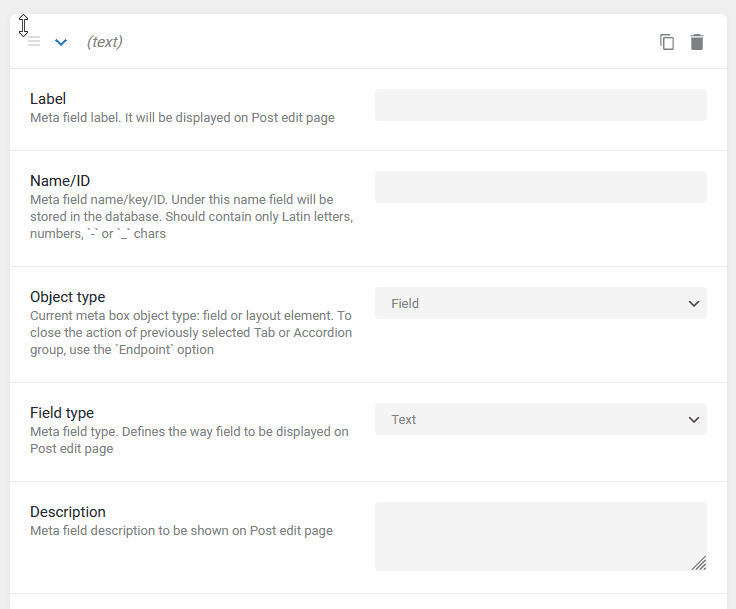
- JetEngine has 18 fields to help you present data in a more user-friendly way. These are:
- Text, Date, Time, Date-Time, Text Area, WYSIWYG, Switcher, Checkbox, Icon Picker, Media, Gallery, Radio, Repeater, Select, Number, Color Picker, Posts, and HTML.
- You add appropriate fields based on what you need and for this tutorial, the only fields I used are select date, text, and gallery.
- Once the meta boxes have been set, proceed to create demo content that will help you design the user interface of your website.
JetEngine Listing | How to create custom loops in Elementor
In WordPress, displaying a list of posts is done through a loop. WordPress themes are developed to handle this by default and it's primarily applicable to regular posts because of the template tags used to format post data.
Elementor Pro doesn't come with this feature by default, you will need an addon like Ele Custom Skin to create post loops for a regular post or custom post types for your site.
Because we are using JetEngine to create our dynamic websites, we have the function to create custom loops for our Car post type using the JetEngine's Listing feature.
Each instance of this list of items, in the iframe below, is our "loop". We create and style only one of them, and it then dynamically gathers the data from the other Cars CPT to list them with the same layout. That's how awesome loops are.
Scroll down a bit in the iframe to see the listing made of custom loops.
To create your custom loop:
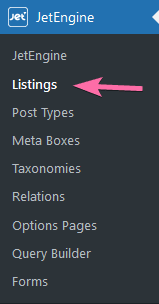
- Go to your WP dashboard and hover on the JetEngine menu link. Click on the "Listings" submenu link that appears when you hover.
- On the Listings page, click on Add New to create a new loop for car CPT or any post types you wish to build a grid for.
- A pop-up with a form that has 4 select drop-down fields appears.
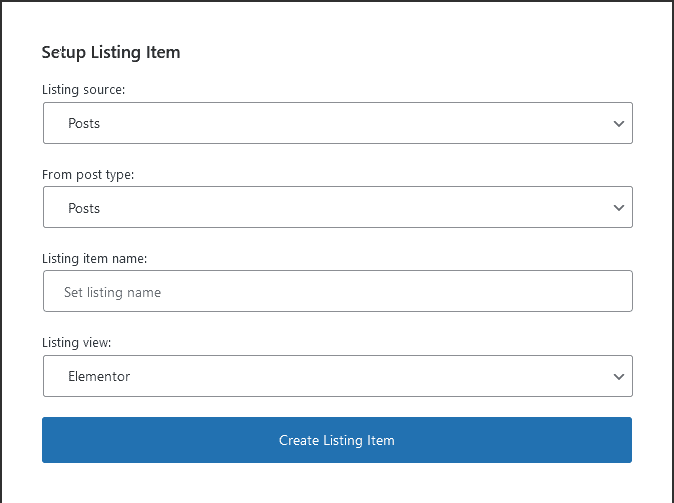
- Listing Source: this allows you to build a listing grid for posts(CPT is a post), terms, users, query builder, and meta box's repeater fields. For this tutorial, we select posts.
- From post type: As a result of selecting posts for Listing Source, this appears. You can select from all the post types available on our site. Choose the one you wish to loop. Post is selected by default.
- Listing item name: Give your loop a name. This is to help you differentiate all the listing grids you have created in the future when you want to make an edit.
- Listing view: you select how you want to create your loops; Elementor or Gutenberg. Elementor is selected by default.
- Then click on the "Create Listing Item" button to open Elementor editor.
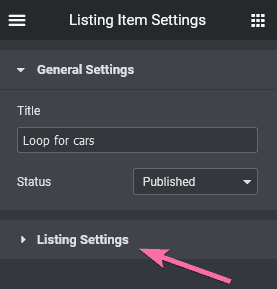
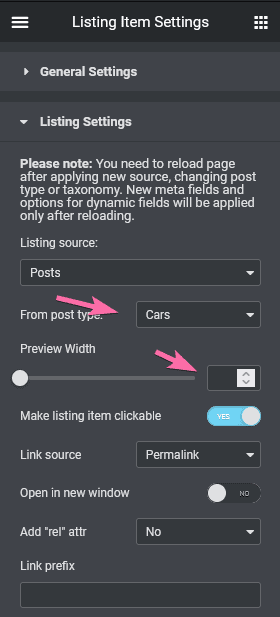
Listing settings in Elementor Editor
In Elementor, there are important settings you must configure to have an accurate preview of your loop.
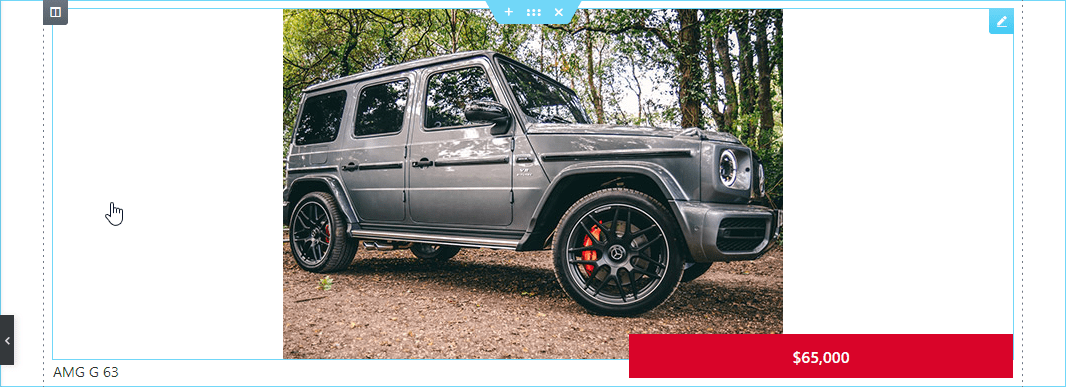
Without adjusting the preview width of our listing, then it will appear like this in the editor, and will be difficult to style accurately.
What you need to do is go in the JetEngine listing settings, adn set a preview width corresponding to how wide you will want the loop to show up on your pages (just a rough estimate is fine).
We will be setting an actual display size only when we will be creating the front end Grid Listing, so don't worry about this here. This is just to preview your design better.
In the listing settings provided by JetEngine, the images below show how to set the width:

How to create a single post template for our car post type
Single post templates let you create individual blog posts with different layouts. By default, our Car post type will use our installed theme's single post template to layout the information in our post type.
We have to create a custom single post template to handle the layout of our car type because our custom post type has metaboxes which are absent in the theme's single post template.
The good thing about this part is, you can use any of Crocoblock's theme core or Elementor Pro to create your single post templates, and for this tutorial, we used Elementor Pro.
In the iframe below is our single post template for our Car Custom Post Type.
Steps involved in creating a single post template with Elementor Pro
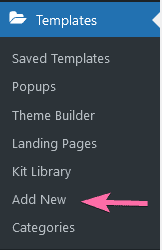
- Go to the vertical menu on your WordPress backend and hover on "Templates", a menu link after Elementor if you go from top to bottom.
- Click on the "Add New" submenu link to get the pop-up that allows you to assign the template to the right post type.
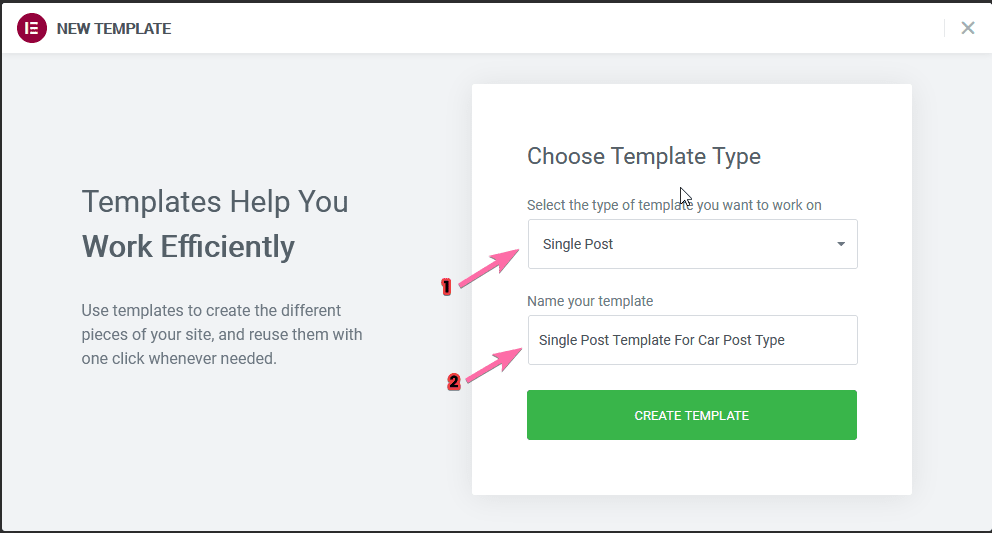
- Set your "Select the type of template you want to work on" to Single post
- Make sure you give your template a name you can easily identify when you come back to edit in the future. For this template, we have named it "Single post template for car post type"
- Click on the "CREATE TEMPLATE" button to open Elementor's editor

Knowing what widget to use in your single post template is crucial to your success in creating a non-buggy template for your JetEngine post type.
This is because Elementor comes with widgets you can employ to dynamically get data from your post type and meta boxes.
JetEngine also comes with an array of important widgets that make things easy for you and whatever idea you may have.
- The featured image attached to a car post type is brought into this template via Elementor's Featured Image widget.
- You can also use JetEngine Dynamic image widget to achieve this but you'll have limited manipulation of the size of your displayed image.
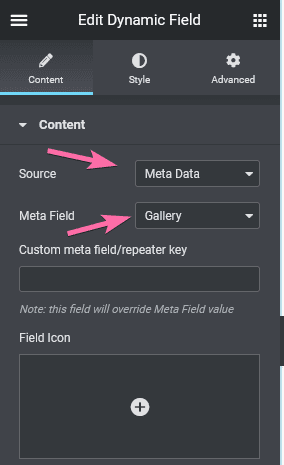
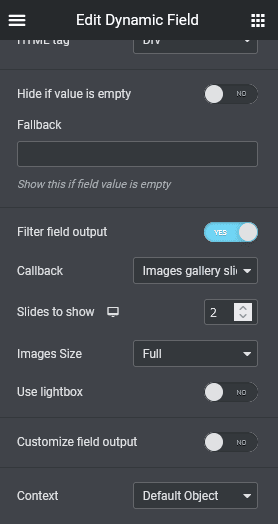
- For the slider gallery images, I used the dynamic field widget to create this beautiful slider. JetEngine allows you to make different callbacks based on the field type. One of the callbacks is "images gallery slider" and our widget is set to it.
Every other data aside from the related product section was pulled into the template using the dynamic field widget.
The listing grid widget was used to create bring in other posts created under the car post type. With it, you can import posts via the loop from JetEngine listings.
- Once you are done designing the template how you want it to be, click on the "Publish" or "Update"(depending on the state you are, in your design) to bring up a pop-up where you have to set conditions.
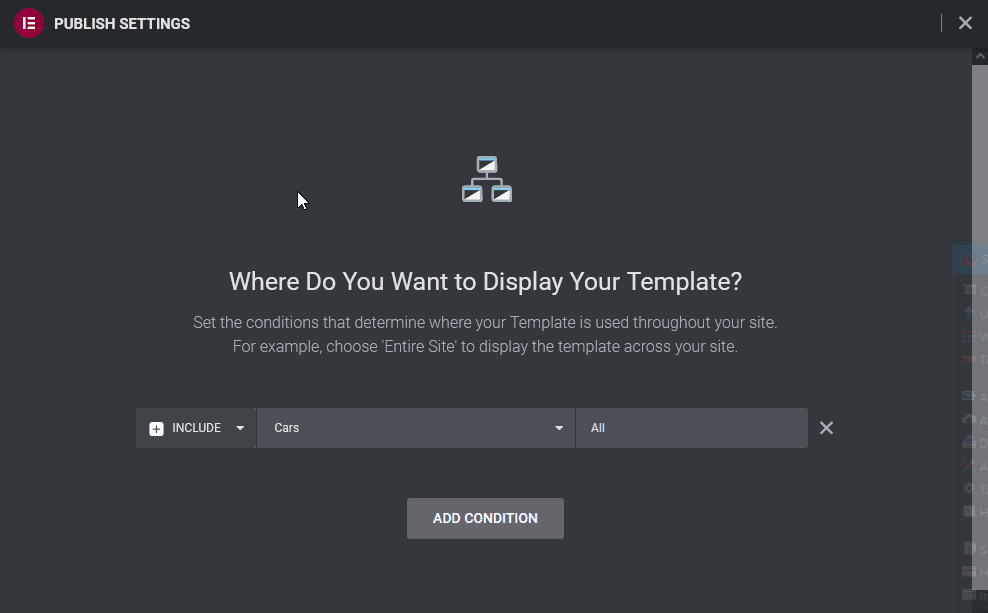
- Set the template to your post type and leave the last field at "All".
- Click on "Save and Close" to publish on update your template.
How to create an archive template
The purpose of an archive page in WordPress is to organize posts by post type, category, tag, or author. Both Elementor Pro and Crocoblock theme core allows you to create custom archive pages for your Car post type.
In the iframe, our car Archive page.
For this tutorial, we will be using the theme builder in Elementor Pro to create our archive page.
- Follow the first two steps in section 3 "How to create a single post template"
- Set your "Select the type of template you want to work on" to Archive
- Give your template a name. For this template, I have named it "Archive template for car post type"

- Click the "CREATE TEMPLATE" button to open the Elementor Editor
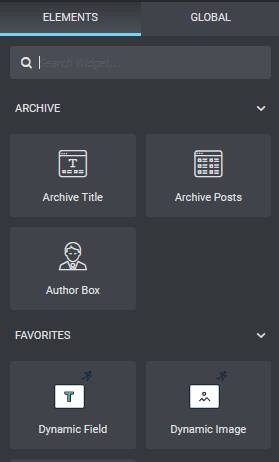
Once the editor loads, you can see from the image below that Elementor has 3 widgets for Archive Template
Before we dive into the widgets used in creating the templates, let's see how we can create those search filter fields.
How to create search filter fields using Crocoblock's Smart Filters plugin
For the all-inclusive license, you have access to a ton of plugins needed for building custom dynamic plugins. Among this collection of plugins are the Jet Smart Filters plugin which allows you to filter contents on a page or archive page as seen on the home page and car archive page.
You can see the filters in action at the top right of this page:
Here is how you can create the filters:
- Go to your WordPress backend and on the vertical menu, hover on Smart Filters

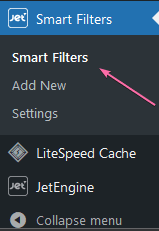

As you can see from the image above, I have created 5 filters I will use on my archive page. The goal of these filters is to help visitors easily and quickly find the items they are looking for on your website.
- On your Smart Filters page, you'd have zero filters if it is your first time using the plugin.
- Click on the Add New button to create a new filter
- Jet Smart Filter comes with 11 field types you can use to create your filter
For this tutorial, I will show you how to create a "Select Field" filter but the same process is used to create other field type filters.
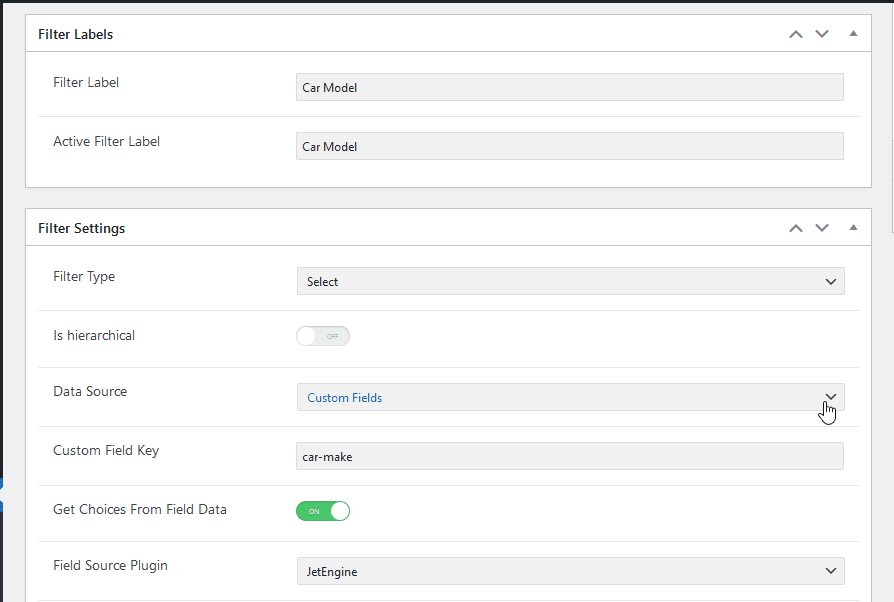
- Give your filter a title(it is important because you will need it on the Elementor editor when creating the filter template)
- Fill the "Filter" and "Active Filter" label fields (this is what users will see on the frontend
- On the filter settings, set the Filter type to any field appropriate to the meta boxes or taxonomy you want to filter
- The "Is hierarchical" field should be set to off if you are not filtering taxonomies
- The data source can be set to any of "Manual input", "Taxonomy", "Post", "Custom fields", and "JetEngine Glossary". For this filter, I have set it to custom fields
- Because I have my filter data source set to custom fields, "Custom Field Key" appears and here, I had to set the field's name as created when I was creating meta boxes for my Car post type.
- Toggling the "Get Choice From Field Data" will bring up the Field source plugin's field.
- You can filter JetEngine meta boxes or ACFs. The Field Source Plugin field is a select field with two options, JetEngine and ACF.
- Because I am using JetEngine's meta boxes, I set the field to JetEngine.
- Publish your filter and proceed to create others as needed.
How to create an archive template(continuation)
With our smart filters created, I can easily bring them into our archive templates now.
- To add a field into the template, go to the Filters section in the Elementor editor panel.
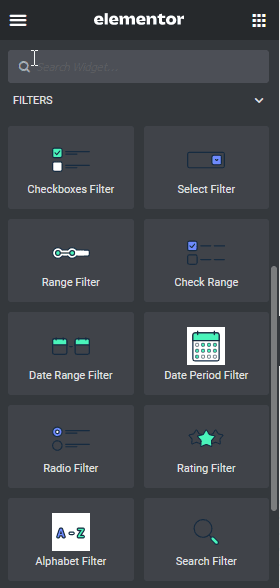
- Drag into your template the appropriate field you want to use to filter data
The Select field is added to the template and this is how it looks
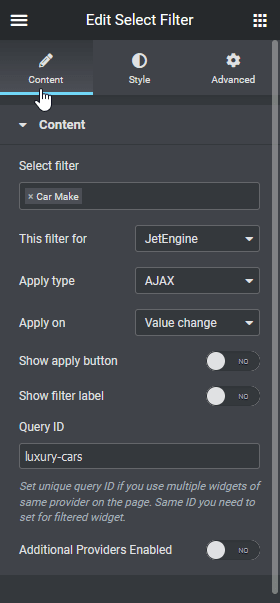
- The Select filter field is set to "Car Make", the title I gave to the field I created as seen in the Smart Filter section above
- "This filter is for" is set to JetEngine, because the grid we are filtering is made with JetEngine Listing element, we need to choose JetEngine
- "Apply type" is set to Ajax. The other two options for this are page reload and mixed
- Based on the design of my template, I chose not to show buttons or field labels. You can choose to show yours
- The "Query ID" is important as it allows the filter to be appropriately applied to the right Listing Grid or other archive widgets such as Elementor Pro Post, Archive, etc
- The process is repeated for other fields until you have the desired design you wish to have. The image below shows how we present the smart filter to users
To add the grid list view of the Car custom post type, I will be using the JetEngine's listing grid.
- Add a new section to your page
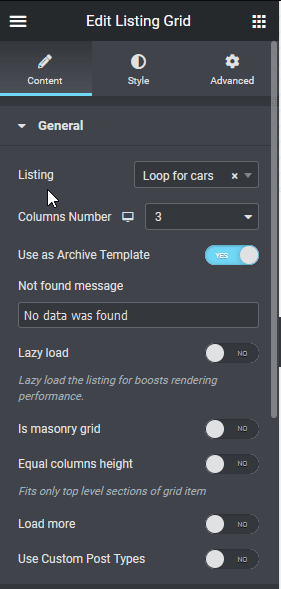
- Add the Listing Grid widget
- Select the loop you created in the JetEngine listing
- Set the number of columns based on device width to how you want
- Toggle on the Use As Archive Template
- Then publish and set the condition to "Car Archive" as seen below
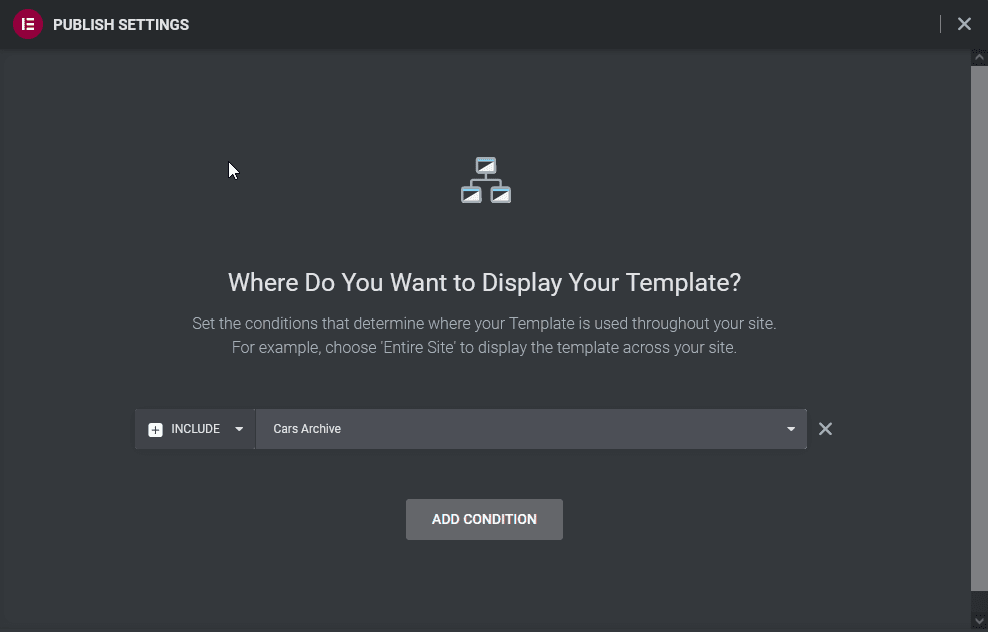
- Save and close
How to create a frontend submission form in JetEngine
Using the Jetform builder addon(a free WP form plugin from Crocoblock), you can easily add a frontend form that allows users to add listing the car they want to sell to your site. The user don't need to log in to your site to be able to add their cars. This section of this tutorial will show you how to create a front-end submission form for your dynamic website.
Here is our front-end submission form, for users to list their own cars for sale.
To create your form:
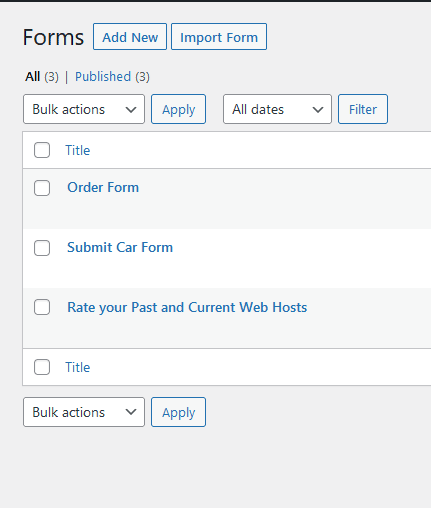
- Go to your WP backend and on the menu, hover on JetFormBuilder, and click on Forms to see all forms of Add New to create a new form
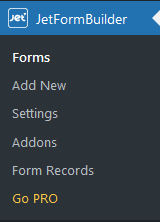
When you click on forms, this is the screen that shows all the forms you have created with the plugin. You can add a new form from here or import form if you already had a JSON file of the JetFormbuilder form.
This is the form and all the fields that we will link to the meta boxes we created when we add the Car post type to our WordPress website.
Text, TextArea, and Image fields are easily connected between the form and car post type meta fields. These are connected using the post-action function of the plugin. What I want to show you now is how to get data from glossary, post, and terms into fields like select, radio, and check buttons.
The process of setting up select field is as follows
- For select you want to set the Fill Option From field to either meta field, JetEngine Glossary, Terms, Posts, or Manual Input. In our case, we are asking the form to dynamically pull the data from the meta fields we created.
- Then add the meta box name to the Meta field to get value from's field
- Click "Apply Changes" to successfully add this field to your form.
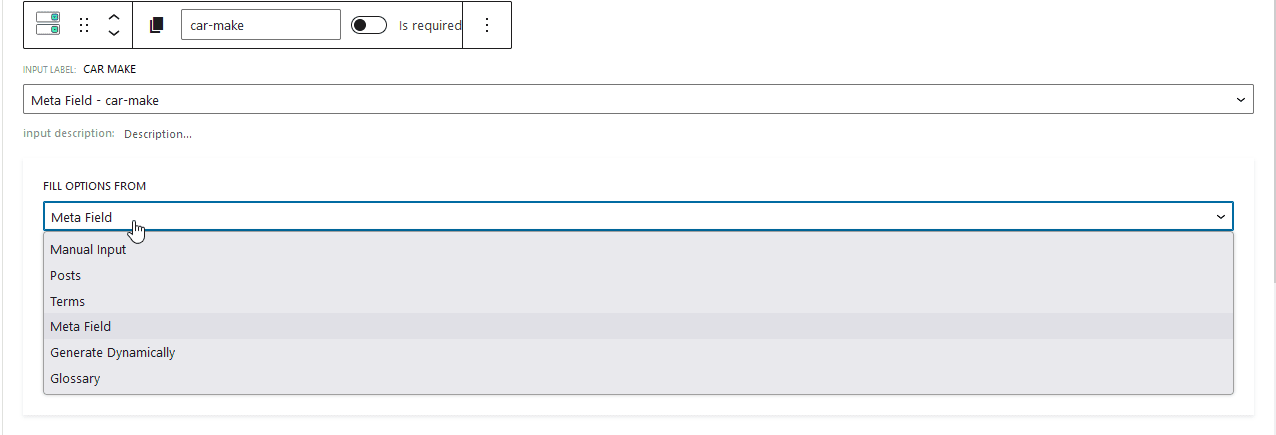
As you can see from the image above, choosing Meta Field as where we want to fill the options, a field appears where we have to put in the name of the meta field we want to get values from.
This procedure is the same for checkboxes and radio fields
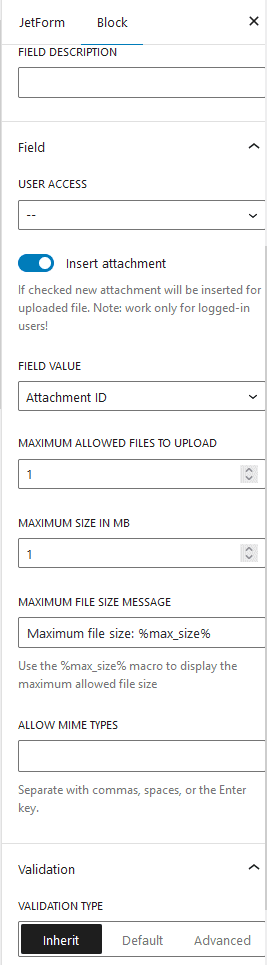
To add a media field to your form
- Set the User access to what kind of role you wish to be able to add post to your website. In this tutorial, I have set it to "Any user"
- By checking the Insert attachment, you get additional fields that appear
- Set the field value to either Attachment ID, Attachment URL, or both. If you set the field value to the attachment URL, the image can't be resized on Elementor editor, should you try to adjust it with JetEngine's dynamic image widget.
- Maximum allowed files to upload can be set to whatever number you want based on what you want to achieve, featured image, or gallery.
- The maximum size in Mb for this tutorial is set to 0.1. This is because 0.1Mb is equivalent to 100kb.
- Allow MIME types to help you restrict the kind of files uploaded to your website. I have set this to image/jpeg
Settings to make sure new form submission is added to the car post type
On the Post-submit Action/Notification settings:
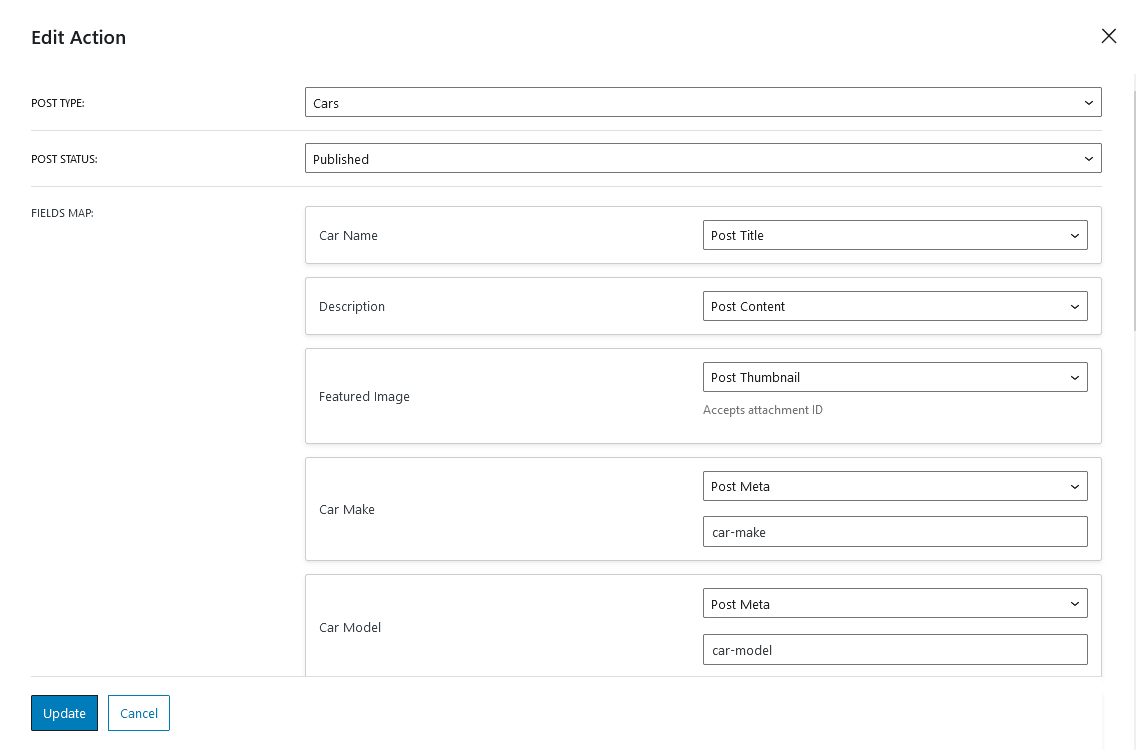
- Set Type to "Insert/Update Post"
- Choose the post type you want to add the new posts to. I have set this to Car
- Post Status can be set. to Publish, Draft, or Pending Review. I have set this to pending review because I want to see what has been submitted before allowing it on the site.
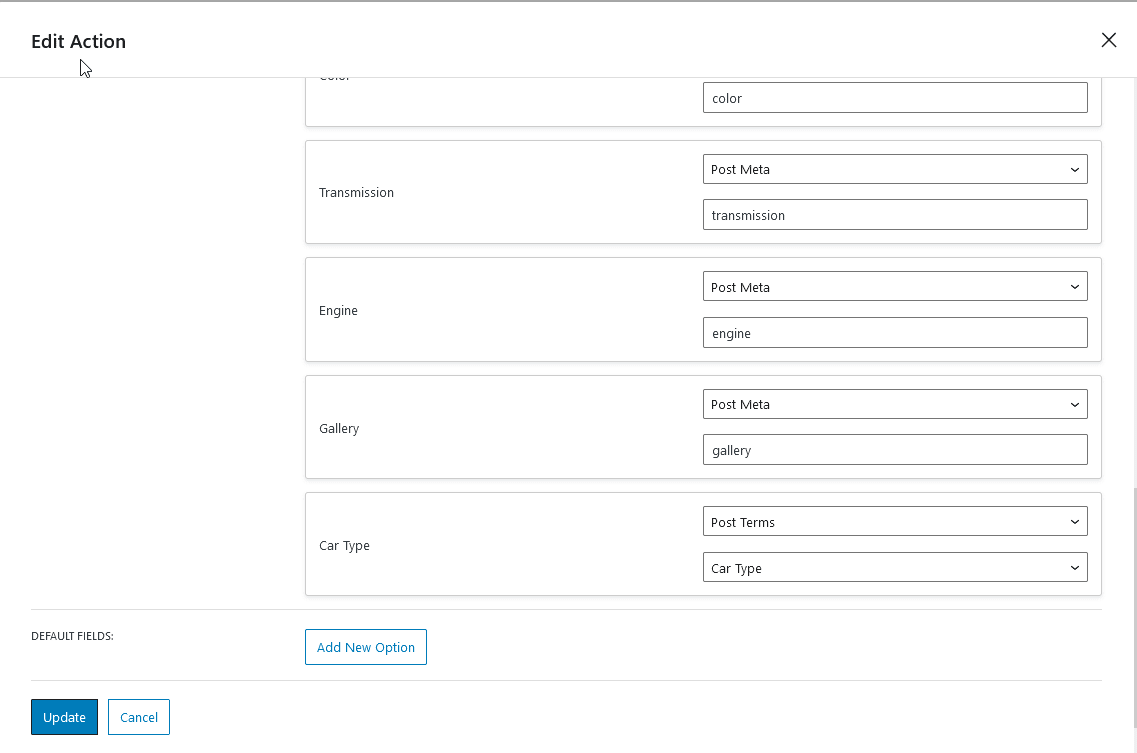
- The fourth path is the most important. You have to map your form fields to your post type, meta boxes, and terms. You do this by choosing whether the field is a meta field or term and if it is a meta field, add the meta field name.
- Because you are adding a new car, the post_id should be set to select post property.
- Then click publish to have your form available to be added to a page.
When you add a new field in the JetEngine form, it automatically generates a name for the field that looks like this "field_name". If I was to follow this structure of using underscore to separate words in field names, then it will become tedious mapping the fields to appropriate meta boxes.
What I do is, when creating the setting newly added fields, I make sure the field name is the same as the meta box name.
In this mapping part, I just copy from the label in the Post-submit Action/Notification settings to the appropriate fields after selecting Post meta as seen in the image above. This method helps you work more efficiently.
Adding JetEngine form to Elementor page
JetEngine makes it easy to add the form you created with the legacy form module in the plugin or Crocoblock's New Form Builder to your Elementor page.
Follow the following steps to add front-end posting to your website
- Since there is a form widget by JetEngine in the Elementor editor panel, all you have to do is drag it into your column.
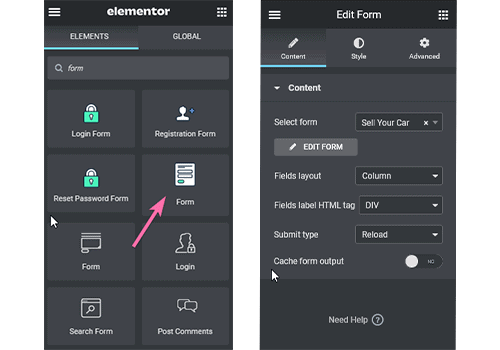
- Select the form you want to add to your page
- Set the field layout to either "Column" or "Row"
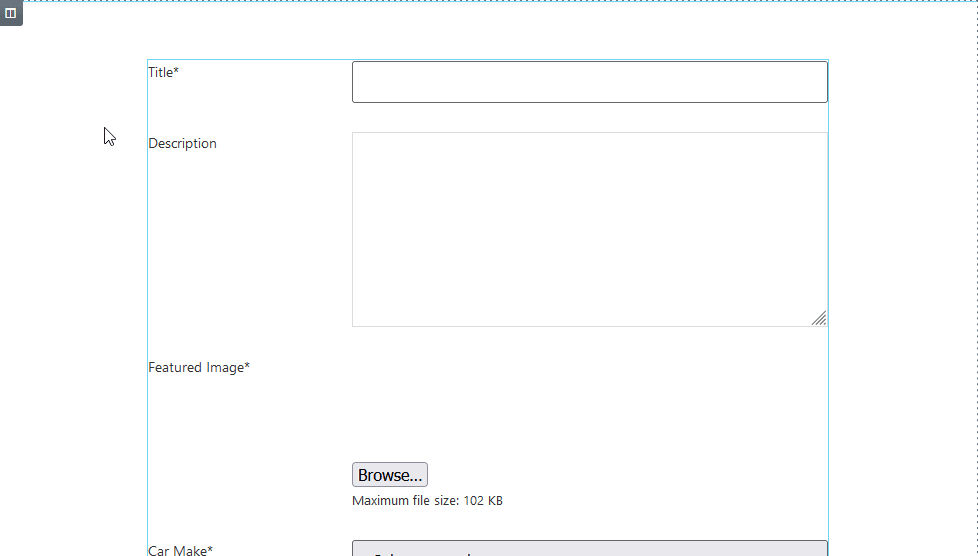
If the field layout is set to "Row", this is how the form will appear.
If the field layout is set to "Column", this is how the form will appear.
- Proceed to the "Style" tab to design the form the way you see fit.
One of the good things about the Form widget is, you can design every field you added to your form in Elementor. It's not something where you will just slap the same paint on all fields, even when you want your checkboxes to really stand out.
Conclusion
I believe that this tutorial has shown you the possibilities with Elementor Pro and JetEngine and that you can use them to build just about any type of website using WordPress.
Here ends this tutorial, but I invite you to look forward to more Crocoblock tutorials from this WordPress beginner blog on how to build better WP sites with Elementor.
Be certain to use this discount code to save an exclusive 10% when buying JetEngine & JetSmartFilters, if you don't already own them.
Let me know if you have any questions or suggestions regarding this tutorial by leaving a comment in the comment section, and I will get back to you as soon as possible.
9 Responses
Thanks for all this, very comprehensive! One question, I don't know how to create an author archive with jetengine, or using jetengine to create the custom loop. Can you explain?
Thanks
Hey Dv!
You can create author archive using the Profile Builder module that comes with JetEngine
This module allows you to create either a personal user’s account page on your website or public profiles of the users similar to social media profiles.
For the author loop, all you have to do is use the JetEngine Listing to create the loop. This time, instead of setting the loop to post or custom post type, you set the loop to users.
Watch this Crocoblock video to learn more about this: https://www.youtube.com/watch?v=I_HOFovnH4k
Thanks, very helpful
thanks for the hard work you put into the post, i would like to know if this could be achieved with the dynamicooo plugin i know this is very powerful and can pull a lot more info into elementor , i also see there is an update in using tokens.
any thoughts or ideas much appreciated.
Hey Adie!
No you could not do all of this with Dynamic ooo alone. You might add dynamic ooo to the stack, to have even more features and possibilities.
Here is what by itself, dynamic ooo can't achieve:
What it can do, is add extra functionality, such as tokens, and others. And since a few weeks ago, it's compatible with JetEngine, so these should play well together.
thank you for the very useful information, but I have a question, how do you do the filter button on the homepage when it doesn't fill in keywords and selecting the category dropdown next to search can work, I've tried it doesn't work, I'm very happy if there is a response from the author. Thank You
Hi, love is step by step guide, but I would love to know how to create an archive template page for a book directory, instead of using any filter to navigate categories, I will love to learn how to create a custom archive page to display each categories.
Eg. Like a business listing site, people can filter by location, business type but I will love to know how to create archive page for it instead of using filter
Thank you
can you tell me how to use taxsonomy with jet form and elementor templete,
basically i want to create submit form where user select the templete and submit the form and a templete open for edit.
I'm not certain about that one, try asking Crocoblock support please.