
In this tutorial you are going to learn exactly what the "selector" keyword does in the custom CSS field.
You will also learn about the wrapper divs for the sections, columns and elements of Elementor, as well as their implications for custom CSS.
Let's get started!
The Wrapper Divs
Every single element, every column and every section in elementor has wrapper divs. The only type of item that does NOT have extra wrapper Divs is the Container element. One container = One div, always.
In this chapter, I'm using the term "div" liberally, simply to mean an HTML element. Sometimes, as with the sections, columns and containers, we can actually choose the exact HTML tag the element has, be it <a>, <section>, <nav> or others.
The columns and sections
Every section in Elementor is, by itself, made out of two Divs. The same goes for every columns, they are also made out of two divs.
Because we can't have a section without any column in it, this means that for a single column section, we already are using 4 HTML elements.
Here is the markup for a single column section:
<section class="elementor-section elementor-top-section elementor-element elementor-element-ce06a20 elementor-section-boxed elementor-section-height-default elementor-section-height-default" data-id="ce06a20" data-element_type="section">
<div class="elementor-container elementor-column-gap-default">
<div class="elementor-column elementor-col-100 elementor-top-column elementor-element elementor-element-bb11d28" data-id="bb11d28" data-element_type="column">
<div class="elementor-widget-wrap elementor-element-populated">

// actual Elementor elements markup show up here, removed for clarity

</div>
</div>
</div>
</section>
Here is the section by itself:
<section class="elementor-section elementor-top-section elementor-element elementor-element-ce06a20 elementor-section-boxed elementor-section-height-default elementor-section-height-default" data-id="ce06a20" data-element_type="section">
<div class="elementor-container elementor-column-gap-default">

// markup of elements within the section here

</div>
</section>
This is important to know, because let's say you are adding custom CSS to the section, and you want to change its flexbox behaviour. Well, you can't target the outer Div here. You have to target the inner div, as it is the one that houses all the columns, it is the one with display:flex;.
The exact same principle is true with the columns: depending on exactly what you want to do, you need to target the proper Div.
Before Elementor 3.0, the DOM was even more bloated, and every section and column were made of 3 Divs. If you site was created before 3.0 was out, you need to enable the experiment "Improved DOM" to get the improved DOM output.
The elements
The elements have two wrapper divs by default, and this is true for every single element. That's part of their global setup, and even elements from addons will have this general markup.
Here are the two wrapper Divs that all elements share:
<div class="elementor-element elementor-widget" data-element_type="widget">
<div class="elementor-widget-container">
// markup for actual element here
</div>
</div>
Note that there will be a bit more content in it. There will be a unique class name, a general class name depending on which element it is, and a few attributes. These will vary however, and what you see above doesn't change from one element to the other.
Here is a complete heading element's markup:
<div class="elementor-element elementor-element-d0cadef my-custom-class elementor-widget elementor-widget-heading" data-id="d0cadef" data-element_type="widget" id="my-custom-id" data-widget_type="heading.default">
<div class="elementor-widget-container">
<h2 class="elementor-heading-title elementor-size-default">Start A Project</h2>
</div>
</div>
Why?
You might be wondering why Elementor has added so many Divs everywhere. Well, many people are wondering the same, including Elementor themselves, to a certain extent. That's why they cleaned it up a bit in 3.0, after all.
There are reasons for it: having all these divs helps to make the styling options as simple as possible. It's a "done for you", easy to use system that already has the bulk of the CSS in place to properly space and position the elements.
This ease of use comes at the cost of bloated code with several Divs that ends up being useless.
Margin and padding
It is really important to understand which of these Divs the margin and padding settings from the UI are targeting.
Let's start with the most important: the elements
Elements margin and padding
Here, I add margin and padding to a Heading element. It works the same for ALL elements, so this example is representative.
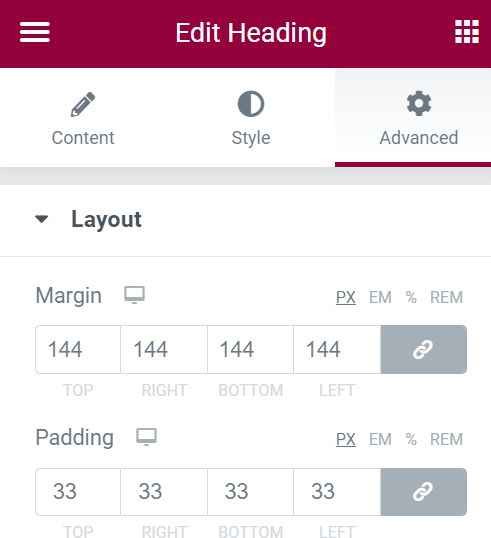
Here is the CSS generated on the front end
.elementor-27792 .elementor-element.elementor-element-d0cadef > .elementor-widget-container {
margin: 144px 144px 144px 144px;
padding: 33px 33px 33px 33px;
}
We can see that it targeted the inner Div, the one with the class name "elementor-widget-container".
This is really important to be aware of, as sometimes this leads to different result than what you might have been expecting.
In Elementor, you simply can't add padding and margins to the elements outer wrapper without resorting to custom CSS.
For example, the margin:auto; property is very useful when it comes to flexbox. It needs to be added to the outer wrapper, as it is the outer wrapper that is the flex item of the parent flex container. You have to use custom CSS to add this.
Sections
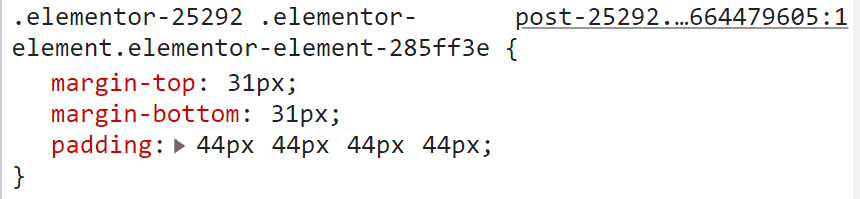
Adding paddings and margins to a section will add the padding and margin directly to the section element, the outer wrapper.
Example, here I added these to a section
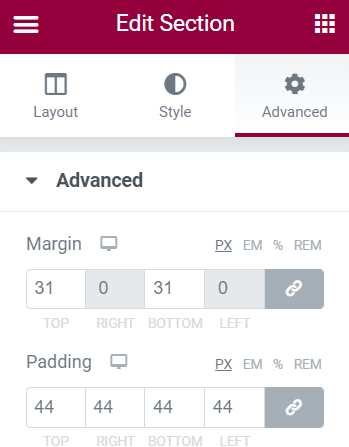
This is the CSS that was generated on the front end:
Columns
On the contrary, adding paddings and margins to a column will add the padding and margin to the inner wrapper element.
For example, here I added these to a column.
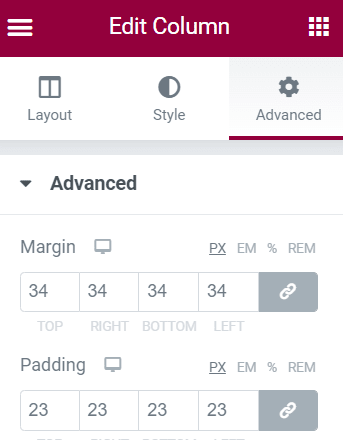
And here was the generated CSS on the front end. Notice how it targets the inner wrapper, the one with the "elementor-element-populated" class name.
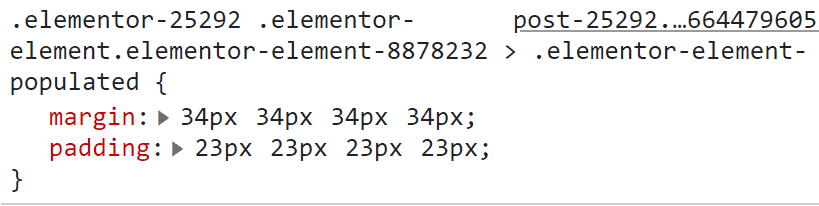
This is important to be aware of. Sometimes, there are occasions where you want a proper margin in between your columns. Adding the margin through the editor's UI won't accomplish this. You have to use custom CSS for this.
Containers
As the containers are a single Div, all margins and paddings are added to that single div. Simple.