
Zoë Tame asked me to help out with this. She shared with me that website, from where she wanted a similar image carousel. I was able to replicate this by reusing their coding technique! Thank you Zoë for sharing this with me!
See the demo here:
If you are instead looking for a proper, user controllable vertical slider, see the Elementor Vertical Carousel tutorial.
First, create the right image for your Elementor Vertical Smooth Carousel
You will need an image, with essentially all your images already in it. I created mine using VistaCreate, a Canva alternative, however any Image Editor software should work fine.
Your image needs to end up looking like this. Ideally with that kind of 'overflow' of one or several images, for a seamless animation loop.

Of course, this has the inconvenience of not being dynamic, and of being troublesome when you want to change just a few of the images.
However, it has several advantages as well. It makes a very lightweight, CSS only carousel, that has no JS dependencies. The animation is super smooth, and the CPU usage is negligible.
In short, it's very efficient, if a bit unpractical.
Instructions for Sections and Columns
After creating your image, give your column the class name 'verticalcolumn'
Set that column 'Widgets Space (px)' to 0 (under Column > Layout options).
In that column, add an image element, and select the image you created. Give that image element the class name 'carouselvertical'.
Set it all up exactly as you want it, and then, duplicate it. You need two of them in that column, with the exact same settings.
Now, add this CSS to the place of your choice.
<script>
/* Please login to get the code
 * The code will be for the Elementor Vertical & Smooth Image Carousel tutorial
 * Found at this URL https://element.how/elementor-vertical-smooth-image-carousel/
 */
</script>
And that's it! Everything should be working fine.
Instructions for Elementor Containers
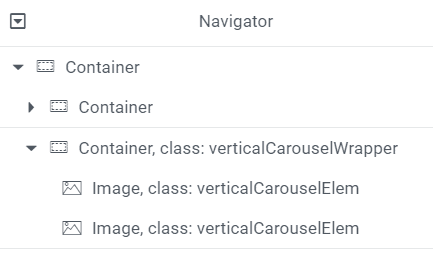
The layout
Replicate this kind of structure, where you will have two containers acting as columns within a parent container.
Give the container in which you want the vertical carousel the class name verticalCarouselWrapper
Add two images within it, and give them the class name verticalCarouselElem
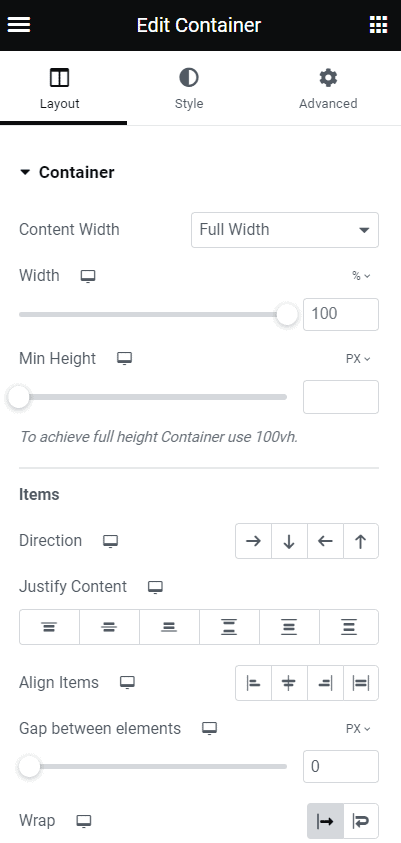
Back to the verticalCarouselWrapper container, set it as follow:
- Content Width to full width
- Gap between elements to 0
- Wrap to Nowrap
Then under Advanced:
- Remove the padding
- Set Size to none
- Be certain you have the class name verticalCarouselWrapper

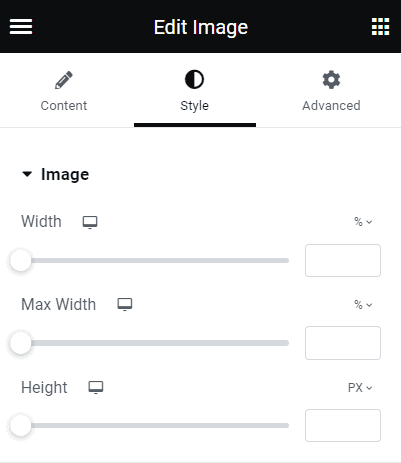
For the images, just set them both to the image you created, of course.
Be certain to avoid setting any styling at all under the Styles tab. The CSS will take care of that, and it should be adjusted there directly.
Now, add this CSS to the page where you want the Elementor vertical carousel
<script>
/* Please login to get the code
 * The code will be for the Elementor Vertical & Smooth Image Carousel tutorial
 * Found at this URL https://element.how/elementor-vertical-smooth-image-carousel/
 */
</script>
Adjusting the code
Depending on exactly what you are after, you might need to adjust the code a little bit. For some of this I won't be able to help as it's specific to every use case.
As it is, the code should work well and be responsive for the layout shown above, where there are two 'column' containers of equal size on desktop and tablets, and they stack on mobile.
The code is made for images that are perfect squares.
To change the direction of the animation, change the word vloopup to vloopdown here:
animation: 10s linear 0s infinite normal none running vloopup;
Finally, enjoy your smooth Elementor vertical image carousel!
Hope you enjoyed! Cheers!
10 Responses
Thank you it's great!
Do you know what I'd need to do to have this scrolling horizontally instead of vertically?
Here is the code required for that. You also need to give the column the class 'horizontalcolumn' instead, and the images the class 'carouselhorizontal' :
.carouselhorizontal { animation: 10s linear 0s infinite normal none running hloop; min-width: 100%; } .horizontalcolumn > div { max-height: 90px; /* adjust this to the approximate height of your images */ overflow: hidden; -webkit-mask-image: linear-gradient(90deg, transparent, black 20%, black 80%, transparent 100%); mask-image: linear-gradient(90deg, transparent, black 20%, black 80%, transparent 100%); flex-wrap: nowrap; } .horizontalcolumn > div:hover .carouselhorizontal{ animation-play-state: paused; /* delete this if you don't want it to pause on hover */ } @keyframes hloop{ 0% { transform: translateX(0px); } 100% { transform: translateX(-100%); } }Hi Maxime, nice tut's , is it possible to do the same in horizontal ?
Hey Delphine!
Yes it is, although the code required is a bit different... I will update this tutorial or publish another tutorial for that!
Wow ! That's awesome ! Thanks for that 🙂
Hi Maxime,
thanks for your neat tutorial. I tried it out and while the vertical works fine I can't figure out what's wrong with the horizontal one. The second image just pops in when the first has left the column. Any idea?
Hey Maximilian!
You need to keep in mind that the horizontal design here works in exactly the same way as the vertical design. The two images need to be the same image, otherwise we will see them swap with each other.
Thanks for your reply. Nope. No matter what I do it doesn't work. I set up the first image, duplicate it, but it keeps showing up too late.
When I have different image dimensions it open empty spaces and overpleap, how can I fix it?
The way this tutorial works is that all of your images are in a single, edited image. Then you have that exact same image, twice, in the Elementor editor.
If you want something more flexible and polyvalent, please check this tutorial instead: https://element.how/elementor-smooth-carousel-ticker-marquee/
Cheers!