
When it comes to creating forms in WordPress, Elementor Pro's form widget is the last option for most WP designers and developers because of some limitations. This guide will explain how to extend the capability of the Elementor Form widget using Dynamic.ooo addons for Elementor.
We will be creating a book session for which users will be able to pick a doctor from our database as the doctor they wish to see for their medical checkup and counseling.
The demo of what we this is what you have in the iframe below.
The magic of Dynamic.ooo is when you pick an option from the available Select field for Physician Type.
In case you don't already have it (required to follow the steps below) you can get Dynamic.ooo at a discount here.
Let's create an Elementor Pro form to start with
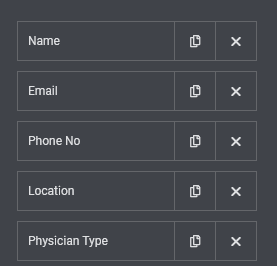
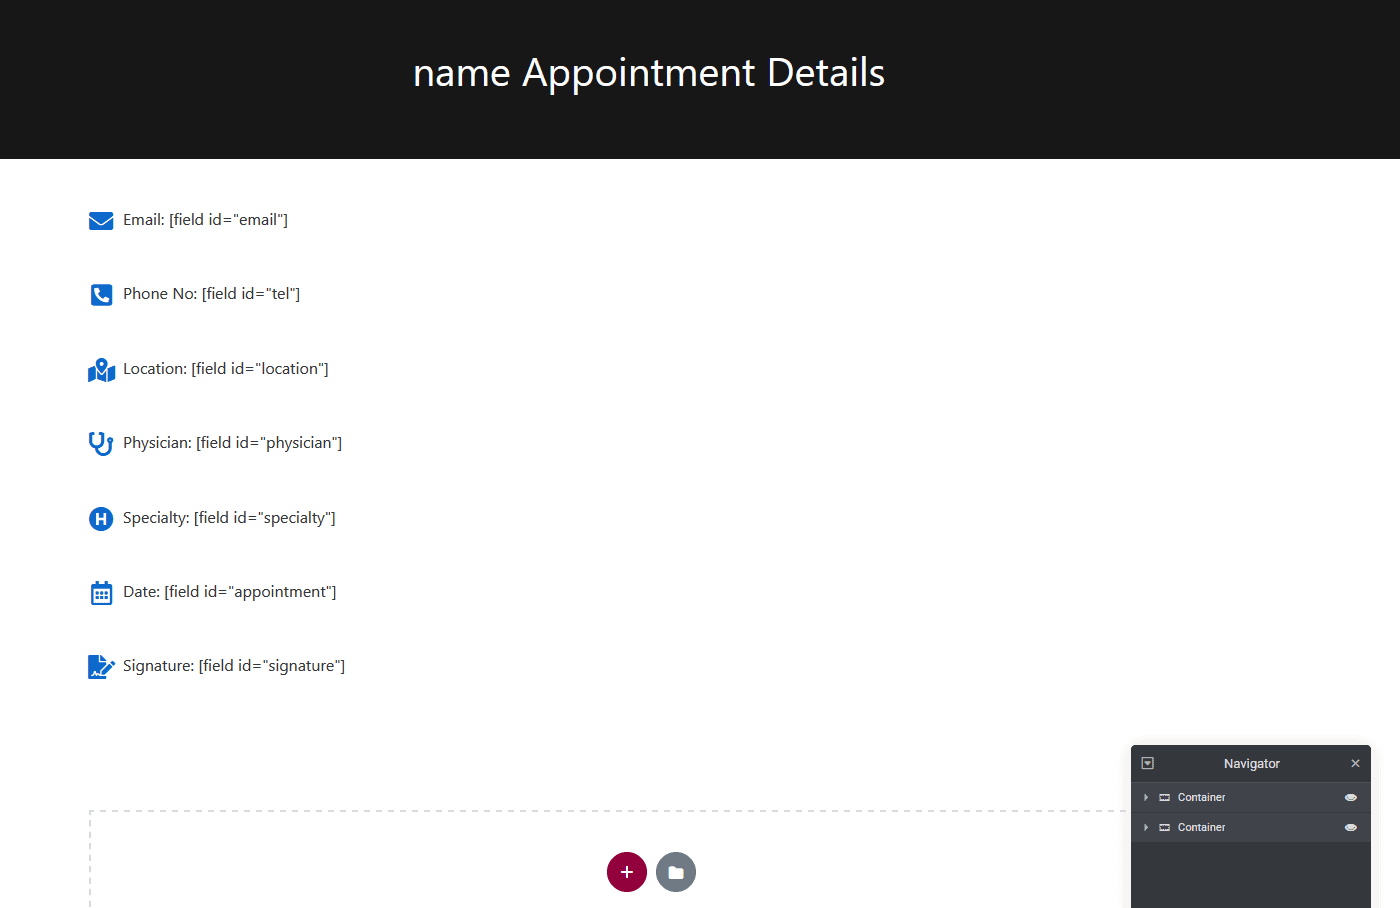
Create all basic form fields you don't need Dynamic.ooo. In our example, as seen above, these are the Name, Email, Phone No, Location, and Physician Type.
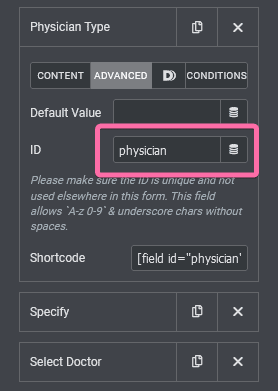
Since other fields in the form were created based on options that existed in the Physician Type select field, you have to give this field an ID. This ID will be used to dynamically pull data when users select what type of physician they want to see.
How to add a Dynamic Select field to your Elementor Pro form
Once the field has been given an ID. proceed to set other fields based on what is needed. In our case, I added the field provided by Dynamic.ooo called Dynamic Select and I have labeled it "Specify" as seen in the image above.
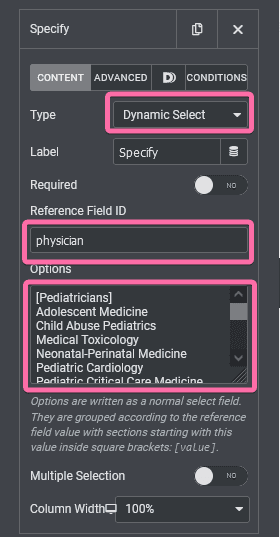
- Type: as you can see, the type of field is set to Dynamic select.
- Reference Field ID: the reference field ID is set to "physician", which is the ID of the Physician Type field.
- Options: this is where you are required to add the options that will be displayed when the user selects an option in the Physician Type field.
- use square brackets and options to create data in your Dynamic select. In our form, we want to pull sub-specialties when the user picks a Pediatrician or Gynecologist. So our option will look like this:
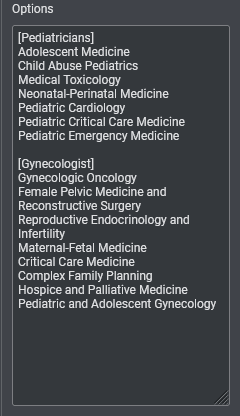
As you can see, we put the options in the Physician Type select field in square brackets and the option that will be displayed if the options(Physician Type) are picked. Here, we have [Pediatrician] and [Gynecologist]. Under the referenced option, add the options you want users to select and that is done.
How to add conditional logic to your Elementor Pro form
Dynamic.ooo makes it possible to show fields based on some user's action in your Elementor Pro form. Although the process of creating this condition isn't as straightforward as you will get in other WP form plugins, it still is something worth having. Probably, in the future, they will make the process easier, especially for beginners.
The steps involved in creating conditions in Elementor forms using Dynamic.ooo is as follow:
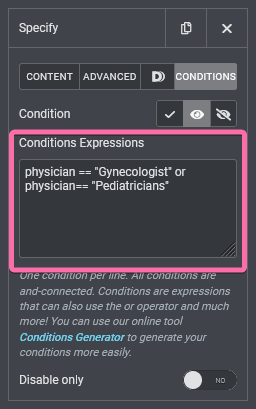
If you have any programming knowledge, writing the conditions in Dynamic.ooo is simple. All you have to do is use the reference ID and the option you want to check. In our situation, the condition is added to the Specify field and we want to show the field based on the options the user picked from the Physician Type field.
To properly have this setup, I used the Physician ID and options in the select field. Remember that our ID is "physician" and we have four options(Select, Pediatrician, Gynecologist, and Neurologist) in the field. We want to show the Specify field based on whether the user picked Pediatrician or Gynecologist.
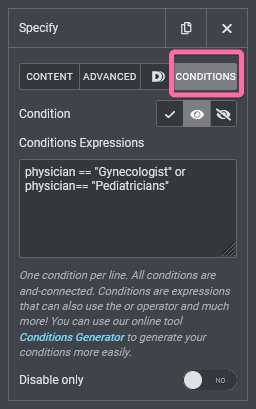
So, we write our conditions like this:
physician == "Pediatrician" or physician == "Gynecologist"
And if you don't wish to manually write the code yourself, then you can use the Condition Generator provided by Dynamic.ooo to create your conditions. Copy and paste in the Condition Expression box when done.
As you can see below, you can create condition expressions easily with the Condition Generator.

Once you are done creating the expressions using the Condition Generator, copy the result given to you by the generator and paste it into the condition expression box, and save and reload the page to test.
How to add a dynamically populated Select field to your Elementor Pro form
This is one of the most useful extensions for the Elementor Pro form provided by Dynamic.ooo. Have you ever wanted to create a form where you can dynamically pull data from your posts and CPT into the form for users to select? Well, if this is you...Dynamic.ooo has made it possible to achieve this.
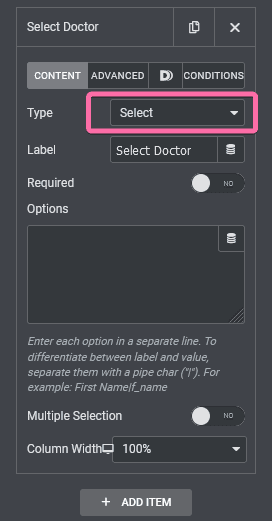
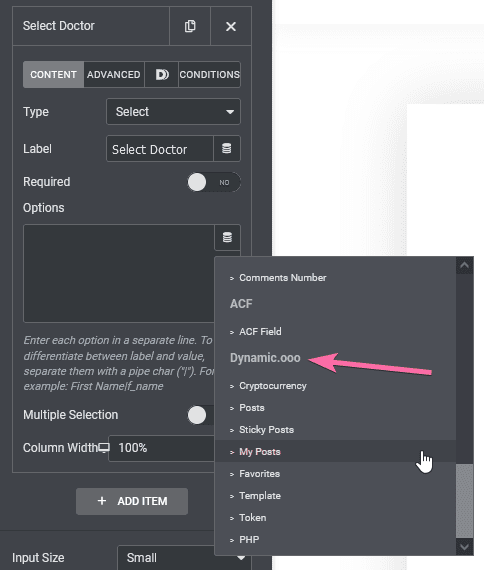
In this tutorial, I want the user to select the doctor they will love to have a consultation with, and to do this, all I had to do was to add the Select field to my form.
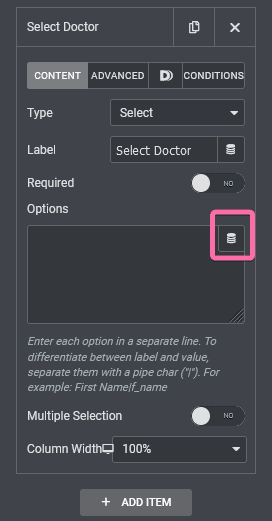
Then, in the Options box, instead of manually adding the options for our select field as we do with the Elementor form, we have to open the Dynamic tag by clicking on the icon.
Scroll down on the opened panel to where you have Dynamic.ooo and select "My Post". The reason why I am selecting My Post is that I want to pull content from a custom post type. If you want to pull content from your blog's post or Woocommerce product, Dynamic.ooo already has that by default. Because we have no woocommerce installed on our site, you can't find products under the Dynamic.ooo section of the panel, but you can see Post, second on the list, after Cryptocurrency.
After selecting My Posts, you have to open the "My Posts" settings to configure it to pull the exact data you need. In our case, we need to only pull published data from the Doctor's CPT.
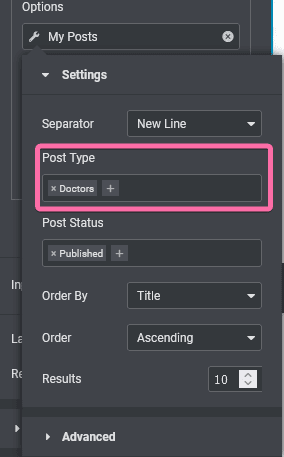
I have chosen to display the data in alphabetical order instead of by date, which is the default setting from this wonderful addon. I have also added the conditions we have in the Specify field to the Select Doctor field and you can see that both fields will only appear if you choose Pediatrician or Gynecologist.
If Dynamic.ooo can make it possible for this extension to be fine-tuned so that we can actually pull the exact data we want, for example, manually adding the doctors we want or fetching doctors under a taxonomy, then this addon will be the complete form solution for WordPress.
How to add an icon selection to your Elementor Pro form
The documentation on how to add icons to your Elementor Pro form's field on Dynamicooo's website is poorly written. It will leave you confused as how it was configured isn't the same way currently. Anyways, that's what this section will handle.
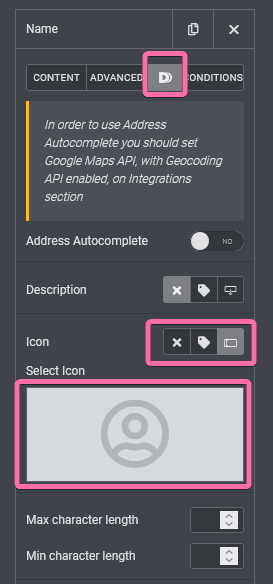
To add an icon to a field on your form, click on the area to expand it and click on the dynamicooo icon. Scroll down to the Icon field. By default, the field is set to "No icon". All you need to do is set it to "On label" or "On Input". The On label option puts the icon before the field's label. For this tutorial of ours, we have added icons using the On input option.
Choosing any of the options that allow you to add an icon to a field will open the Icon Picker field where you select your icon from the Elementor Icon library.
How to add a signature field to your Elementor Pro form
Dynamicooo makes it possible to add a signature pad to your form created with Elementor Pro form widget. This is one of the most outstanding features of this addon if one is looking at creating WP forms that require all manner of data from users.
To add the signature field to your form is easy and has fewer configurations when it comes to setting it up. Once you have added a field to your form scroll down the options to Signature. Picking the signature will present the basic setup as you see in the image below.
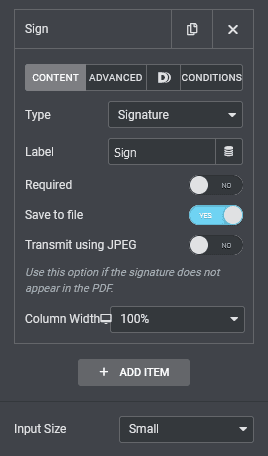
By default, the form field is set to 400px. You can change the width by going to the Style panel where you have to manually adjust the width based on device width. One problem with this is that there are no other units like % and VW which should have been used for making the signature pad.
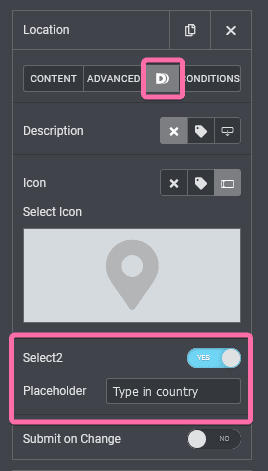
How to add a Select2 field to your Elementor Pro form
Do you have a select field with lots of options in your Elementor Pro form? Do you want to make it easy for users to easily find and select the option they need without having to scroll through the whole list of options in the field?
Then this feature makes it possible. If you check the Location field in our demo form, I intentionally added the countries in no particular order(descending or ascending) so users can use the "search field" when they click on the drop-down.
To add this to your select field, all you have to do is click on the dynamicooo panel of your select field and toggle on the select2 option in the panel.
How to generate a PDF dynamically from your Elementor Pro form
Dynamicooo has an extension that further adds more capabilities to our Elementor Pro forms, and this is the ability to generate PDF on form submission. Although this is a worthy addon from this great plugin, it is worth noting that there is poor documentation on how to use it.
The process of setting up your form to generate PDF has been updated but Dynamicooo is yet to effect the changes to their documentation. We will update our appointment booking form to generate a PDF that users will submit to the receptionist when they visit the hospital for the consultation.
If you have watched Paul C's WPTuts tutorial on PDF generation using Dynamicooo, be rest assured that some of the current processes are the same but the majority of them aren't. This section will thoroughly help understand how to properly set up your Elementor Pro form to generate PDF. And, you should also know that this feature allows you to generate a PDF from a custom post type(useful if you are creating an online CV site).
Alright with the long talks... let's dive into setting up our appointment booking form.
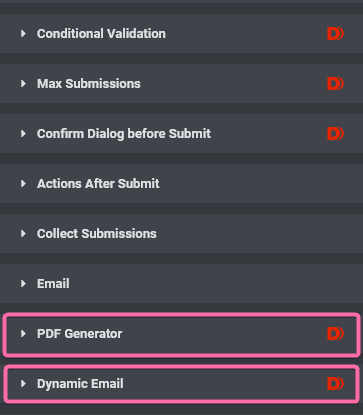
- Set up "Action After Submit"

By default, the Elementor Pro form widget comes with "Collect Submissions" and "Email' actions to be performed when the user submits the form. Installing Dynamicooo in your WP website takes possible actions a step further and out of the several options available, we have added: "PDF Generator" and "Dynamic Email" to our form.
- PDF template design
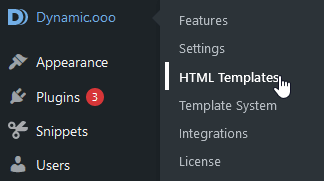
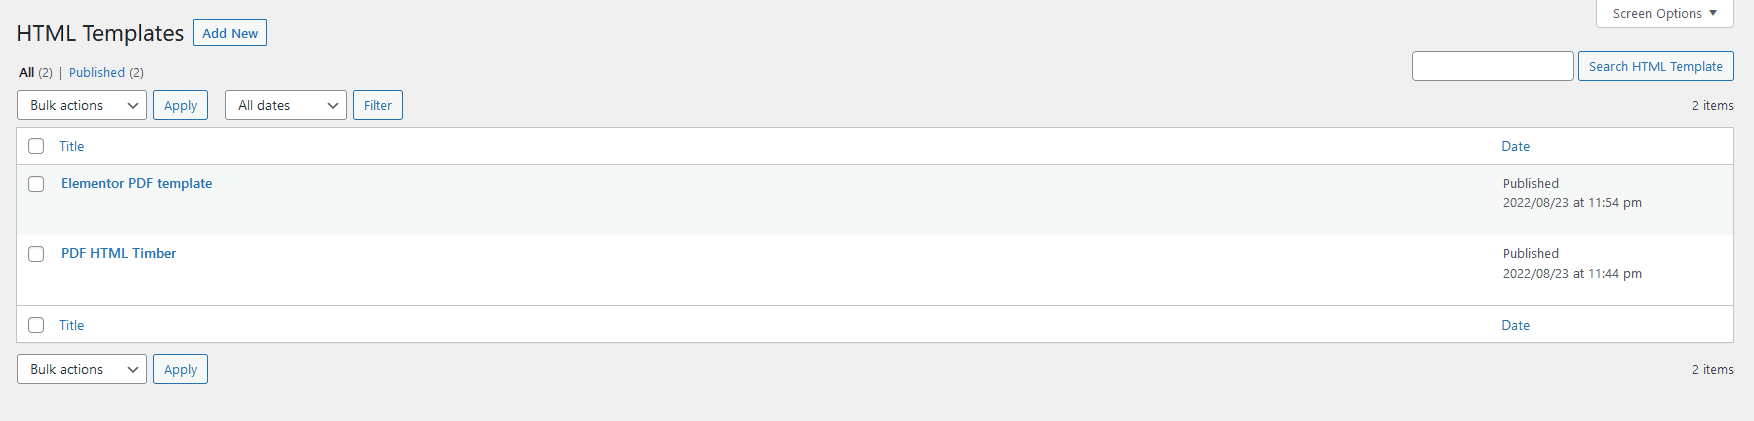
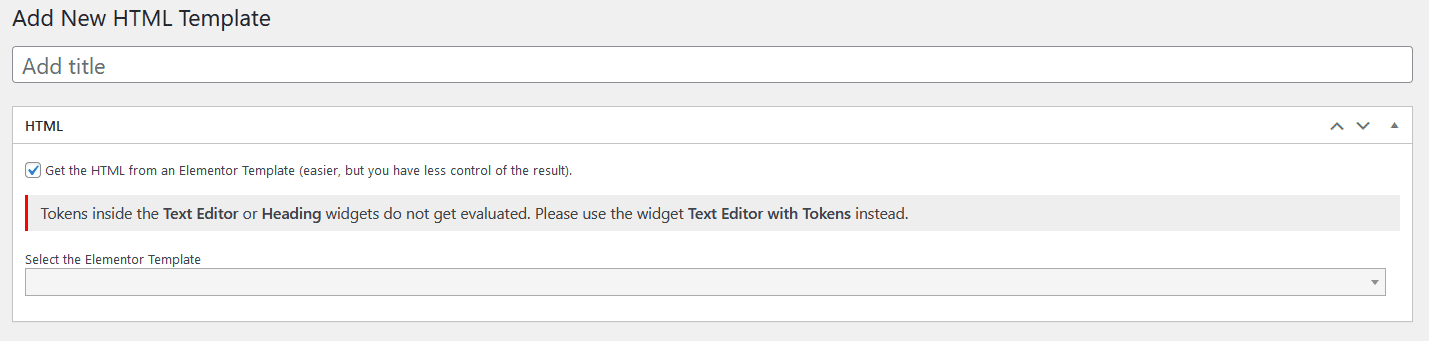
Go to your WP dashboard and hover on Dynamic.ooo, then click on HTML Templates.
If you don't wish to use the HTML style provided by Dynamicooo, all you have to do is tick on the Get the HTML from an Elementor Template (easier, but you have less control of the result). And you will be able to create your PDF template using Elementor. In this tutorial, we are going to use Elementor but we will through some lights on how to create your template using the HTML style provided.
Using Elementor as our HTML template
As you can see from the warning when you choose to use Elementor, do not use Elementor's default widgets to create your PDF template. You are to use the "Text Editor with Tokens" provided by Dynamicooo for every field where the output is text. All you have to do here is to select your template from the library. You do need to create and save your template, to be able to use it here. Select your template and hit the Publish button to create your HTML Template. Don't forget to give it a title as it is the title you will have to type when configuring the PDF Generator and Dynamic Email settings in your form.
The icon alignment with the Text Editor with Tokens widget was made possible using the Elementor flex container feature. You can achieve the same using the section widget that is in the standard version of Elementor.
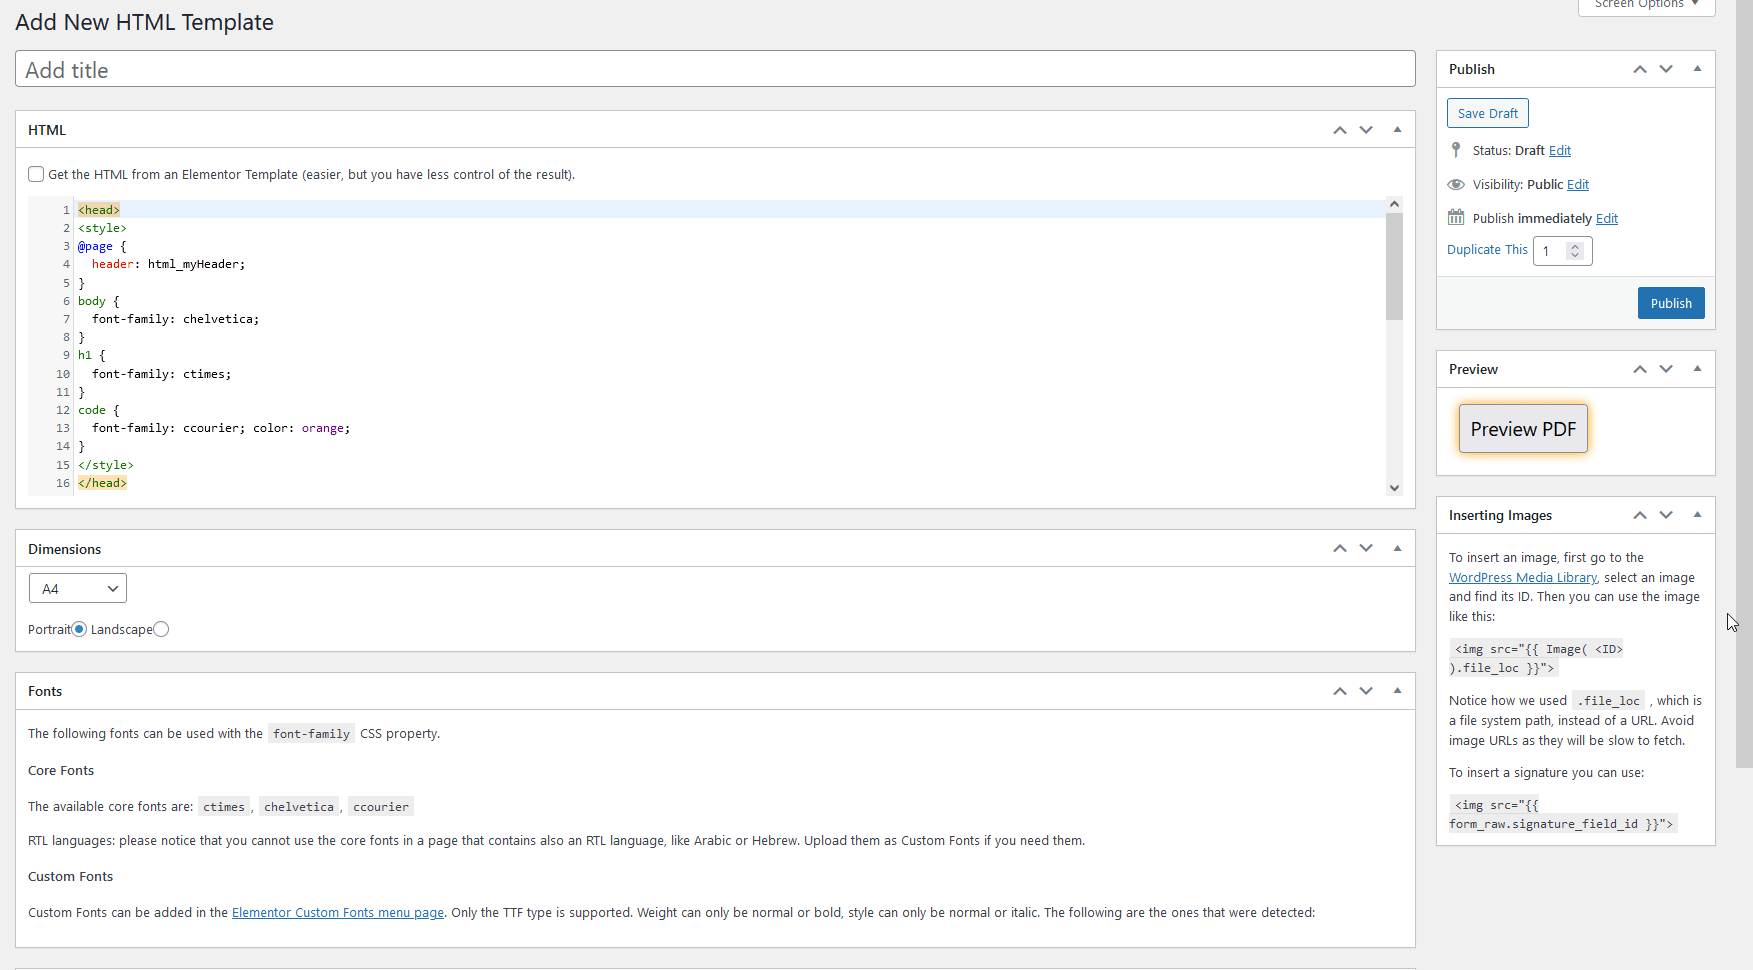
Creating Template using HTML
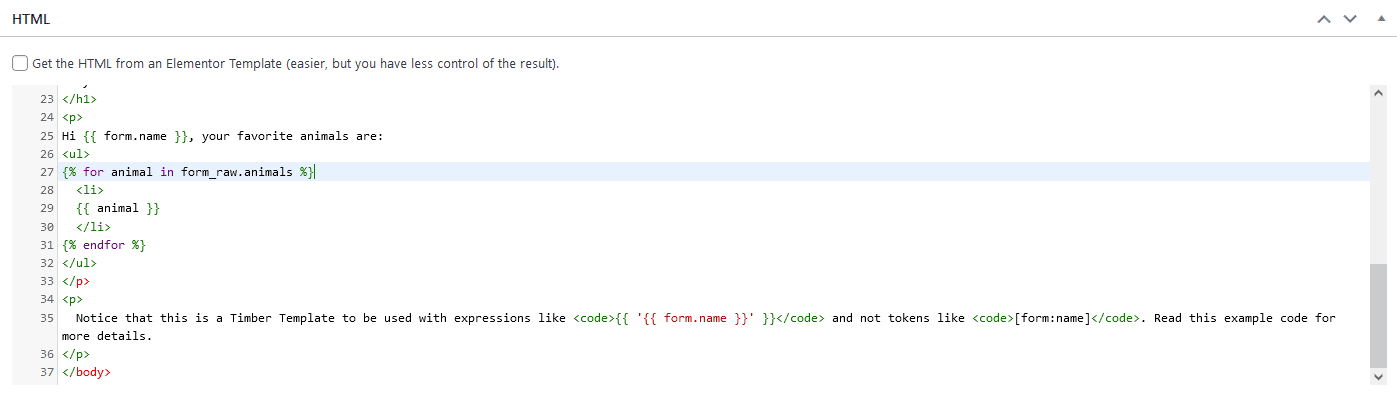
You can create the HTML template using HTML and some code structure. Before you start creating your template, you need to install the Timber plugin on your website. Once installed, then you can use the code structure within HTML element tags to properly display the info you wish to have on your PDF. The code structure looks like this:
[code]<code>{{ 'form:name'}}</code>[/code]
The form:name with "name" being the ID of the field. If you are to use this method of creating your HTML template, it is mandatory that all form fields should be given IDs. One problem with this process is, that you need to have some programming knowledge to be able to display multiple items in a field(for example, if the field is multi-select and a user chooses more than one value).
With Timber code expression, you can use a for loop to display fields with multiple values as seen in the image above.
- Set up Dynamic Email and PDF Generator
Open the PDF Generator and you will see options like in the image below:
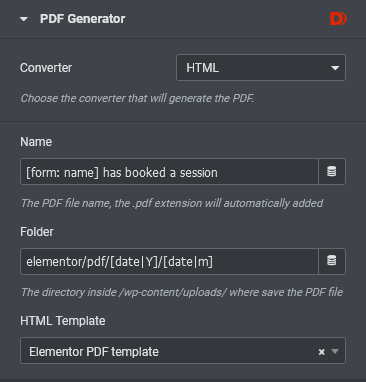
- Converter: you can set your template to PDF or SVG. In this guide, we have chosen to use the HTML feature.
- Name: you can give your file a name and will be added to the name of the document with the .pdf extension.
- Folder: this allows you to choose where you want your file saved on your server. It is best to leave it to the default value.
- HTML Template: this option allows you to choose the template design you want for your generated PDF. I will show you the new ways to create this template.
And for the Dynamic Email, we want to use it to send the generated PDF to the user that filled the form. The images below show our configuration.
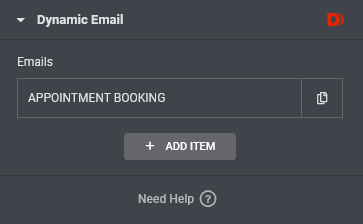
The "ADD ITEM" button under the Dynamic Email allows you to set your form to send emails to more than 2 persons if that is what you want. In our case, we want to set the email to send the PDF to the user, so we only need one item.
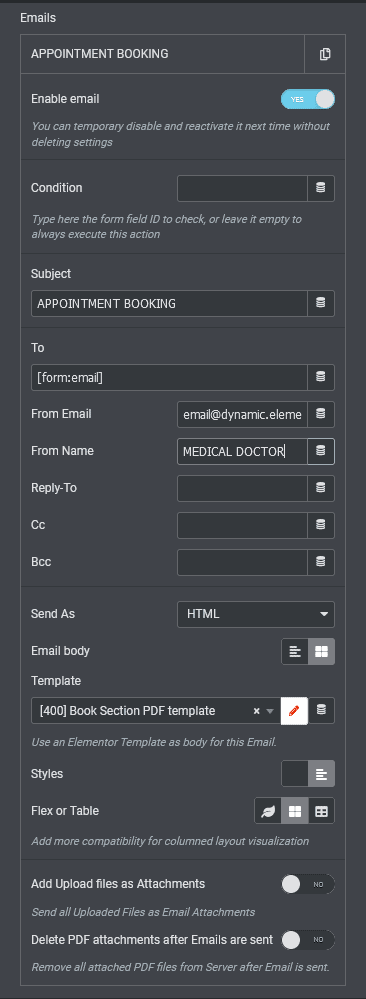
Opening the "APPOINTMENT BOOKING' item, you get the above image.
- Condition: This is useful if you did not use the required option that comes with Elementor Form.
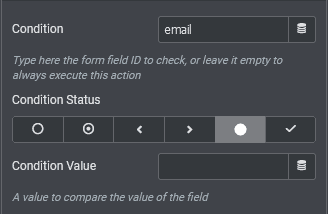
-
- Add the ID of a field you want to set a condition on.
- The Condition Status is used as comparison and goes from Empty, Volarized with any value, Less than, Greater than, Equal, and Contains, if you look at it from left to right. In our image above, I chose Equal to bring out the 'Condition Value' field.
- Subject: Whatever you type here will appear as the title of the item in your Dynamic Email tab.
- To: this is where you set your form to send an email to the user filling it. And to do this, we need to use Dynamicooo's token feature. As you can see, [form:email] is telling it that we want to use the email field which has an ID of email to be the email this form's generated PDF should be sent to. By default, it is always the admin email of the site that is shown here.
- From Email: here, you type the email the form is coming from. We have sent this to email@dynamic.element.how. Like it is from our business.
- From Name: This will be the name of the business. As you see on your Gmail inbox: the name of the business and the subject of the mail are shown to you by default.
- Reply-To: You can set the email you want them to reply to if you want.
- Cc: And here, are the emails you want to receive the submission.
- Bcc: Same as Cc.
- Send As: You have two options; Plain and HTML. Plain will send it as just plain text, while the HTML option will send it based on the design you set in the HTML template.
- Email body: This has two options as well; Message and Template. We don't want it to be like na ormal email message. So we have to choose the Template option which will allow use to select our template
- Style: Also has two options: Only HTML and Inline. Choosing Inline will open the Flex or Table field. Only HTML option means you want to have your PDF generated with the template and no additional work needed on it.
- Flex or Table: this allows you to control the columns layout. It provides you with 3 options, CSS Flex, CSS Table and HTML Table. I have chosen CSS table because I want to maintain the design in the template created with Elementor.
- Add upload files as attachments: As the name of this field signifies, you can have uploaded form files be added as attachement or not. Because our signature field has to be upload as an image, it is right to turn this on. If you don't have such in your form, it is advisable to keep this off.
- Delete PDF attachment after Emails are sent: You can choose to keep all PDF generated on your server or automatically delete them. You know what's best for you.
Conclusion
While the form extensions provided by this addon take Elementor Form to new heights, I couldn't capture all that is possible with this addon.
For instance, the location Autocomplete feature by Dynamic.ooo should have been discussed in this tutorial. You probably already know what it does though, as it's frequently seen online. It's that address autocomplete, powered by Google maps API. Yep, that's available with Dynamic.ooo as well.
I recommend Dynamic.ooo to web design agencies building websites using WordPress and Elementor. It can be used for complex websites as well as smaller projects like landing pages, which often require an advanced form.