
You can easily create circle images in Elementor by using the image widget that comes with the page builder. You won't be needing Elementor Pro to create circle images as everything you need for this effect is available on the free version.
How to create a circle image in Elementor
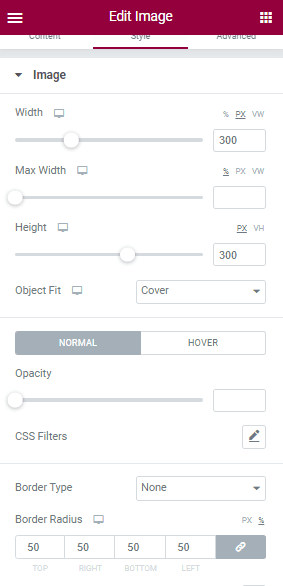
- First, set the width and height to exact same value, in px
- Then, set Object Fit to Cover
- Set the border-radius unit to percentages(%)
- Enter "50" into the fields under border-radius
- That's it. you have a circle image.
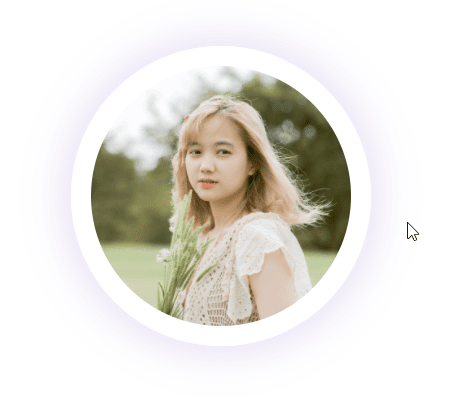
Following these steps will replicate the first image in the demo.
To create the second and third image
The first thing you need to do is set border-type to solid. Once you have solid for border-type, two fields will show up, which allows you to set the width and color of your border.
The border's width in the second image was set to 20px and you can set box-shadow to how you want it to be.
To replicate the third image, all you have to do is change the border type to groove. Adding color to the border type will give you unpleasant results that are very different from what you saw above. Just leave the border-type set to groove.
How to position circular images in Elementor
Because we used source images that don't have equal sizes for width and height(ie they are not square), a custom code was added to position the part of the image we want at the center. By changing the values you see on the code, you will be able to position your image the best you deem fit.
The code to achieve this is:
<script>
/* Please login to get the code
 * The code will be for the Super Easy Circle Image in Elementor With Total Control tutorial
 * Found at this URL https://element.how/elementor-circle-image/
 */
</script>
What does this code do?
Using the object position property, you can adjust how images are displayed. The first value of the object-position property is used to move your images left and right (move it on the x axis) and the second value is used to move images up and down (on the y axis).
Simply add the code to the image > advanced > custom CSS, and have a play with the values, you will understand pretty quickly. Use values from 0% to 100%.
I hope you found this tutorial helpful in your web design project. Check our blog for more tips on website design in Elementor by clicking here. You can also follow us on Youtube and turn on the notification to get new design tutorials about Elementor!